Stairs Measurement
Preparation
For stairs measurement please download the special targets and two start boards using the links in the Settings view of the app (one level back). Print the sheets and the targets on cardboard or glue them onto cardboard such that the targets are flat and not moving.Positioning of the measuring marks
- Place two markers on each step. The green tip of the marker defines the point to be measured.
- Place one start board at the bottom platform of the stairs.
- Place additional targets around the bottom start board.
- Place the other start board at the top platform of the stairs.
- Place additional targets around the top start board
Taking photos
The photos must meet the following requirements:- The pictures must be sufficiently bright. Turn on all available light sources. The flash of your device's camera is turned on by default. If it isn't, turn it on.
- Set your device's camera to wide angle/minimum zoom. Do not change the zoom setting while taking photos
- The images must be perfectly sharp! (see images below)
- Make sure that at least six targets are visible on each photo. Make sure that the left and the right target of a step are visible in the image
- Do not move or touch the markers or the start board any more. Even small shifts could distort the measurement result. Start over with the photos if need be.
- Stand next to the wall or the handrail when taking photos (also on platforms). Standing in the middle of a step or a platform may reduce precision and recognition rates.
- Start at the bottom platform.
- Take seven photos of the starting sheet.
- Walk up the stairs and take a photo on each step.
- Take at least seven photos on the top platform, especially from the edges of the platform towards the targets.
- Walk down the stairs and take a photo on each step.
- Take seven photos of the starting sheet.
- Walk up the stairs and take a photo on each step.
- Take seven photos on the top platform
- Walk down the stairs and take a photo on each step.
- Divide the stair platforms into imaginary 50cm x 50cm squares and take photos out of each square.
Evaluation
Click "Compute" in the 3D view. A few seconds later you should see the results. You can export them from the settings menu at the bottom right.Right and Wrong
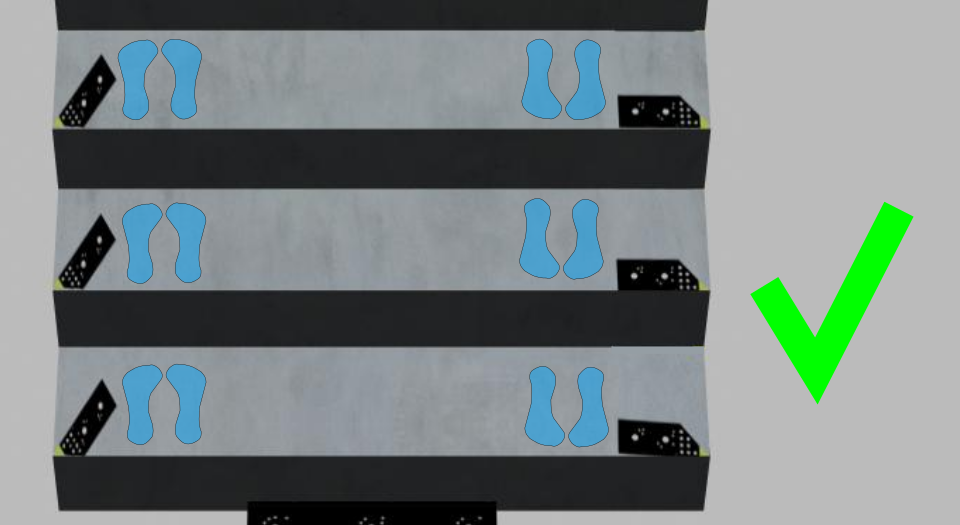
Do not step on the markers |
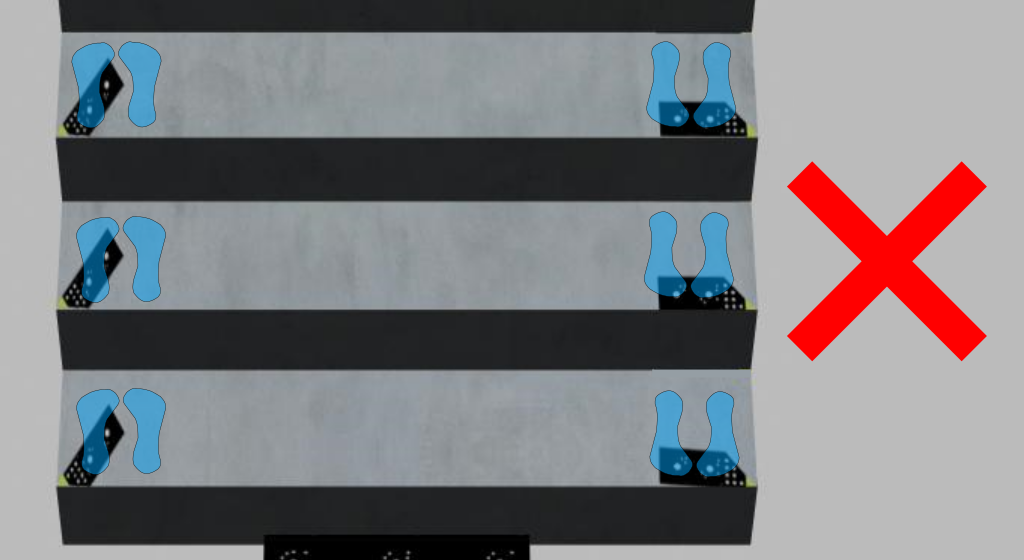
Wrong: markers are touched when taking picutres |
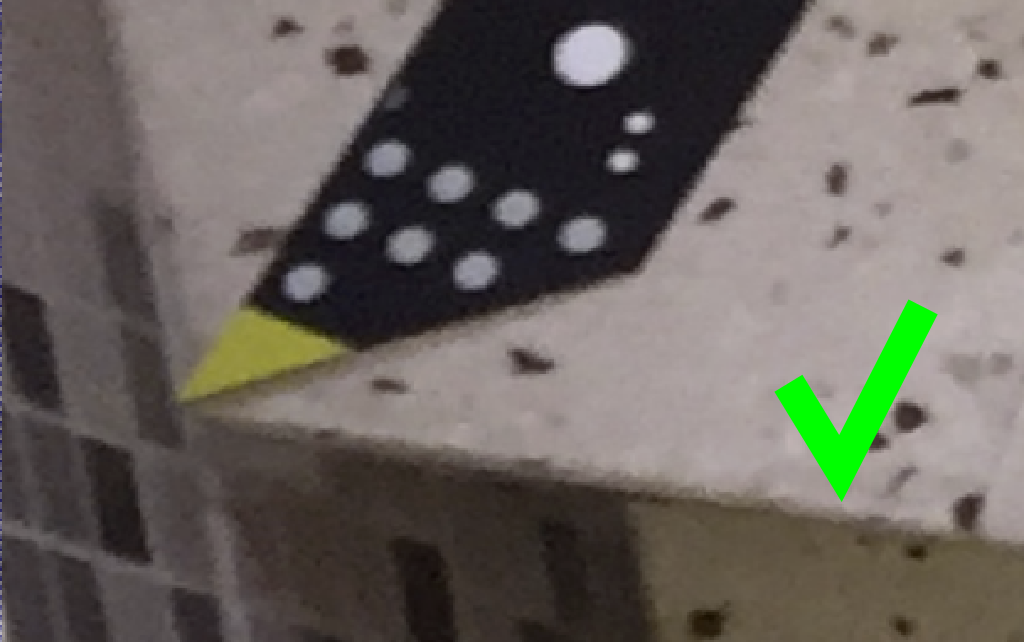
The markers should be clearly visible and, e.g., not be covered by other steps |
Wrong: markers not visible on the right side |
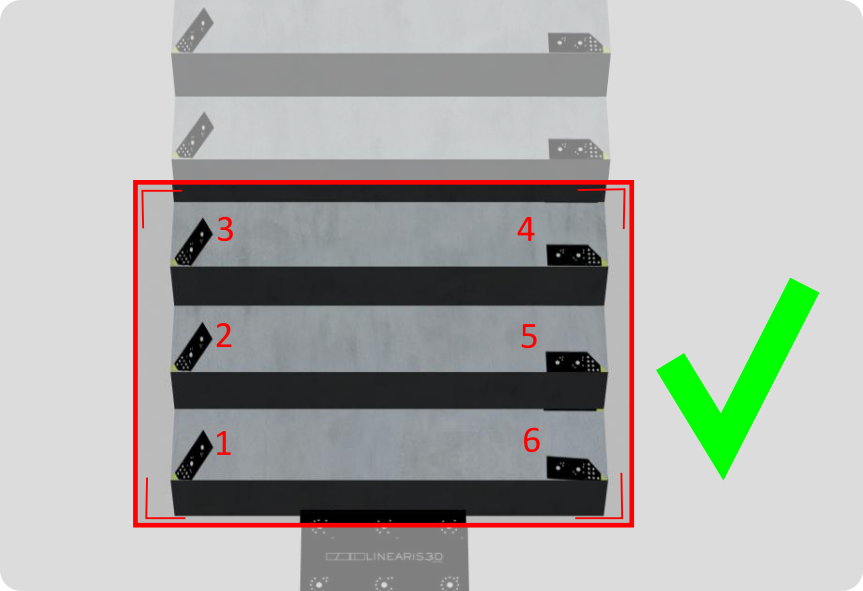
At least six markers per picture and two per step |
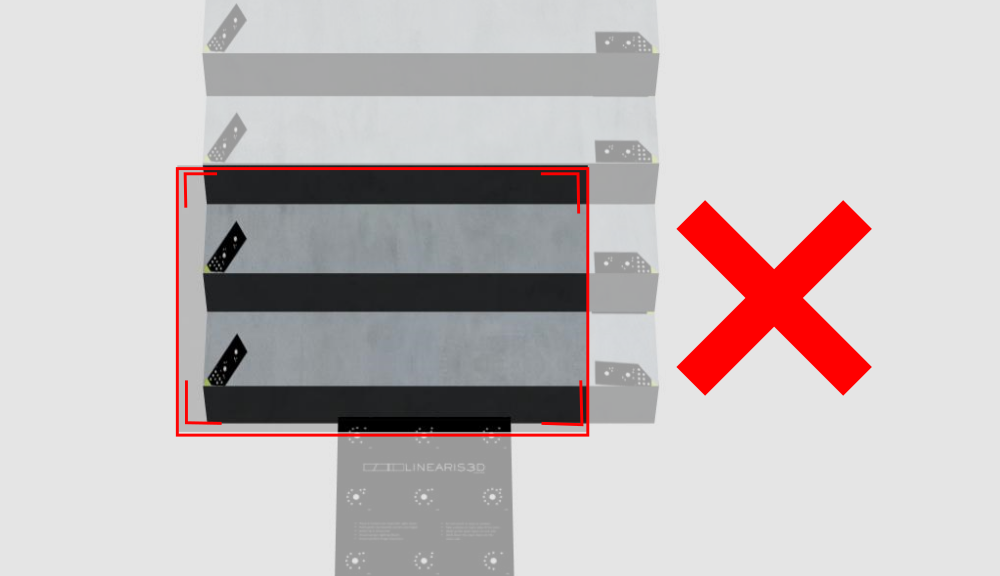
Wrong: Only one side of a step is visible |
Sharp pictures are absolutely necessary |

Wrong: blurred picture |
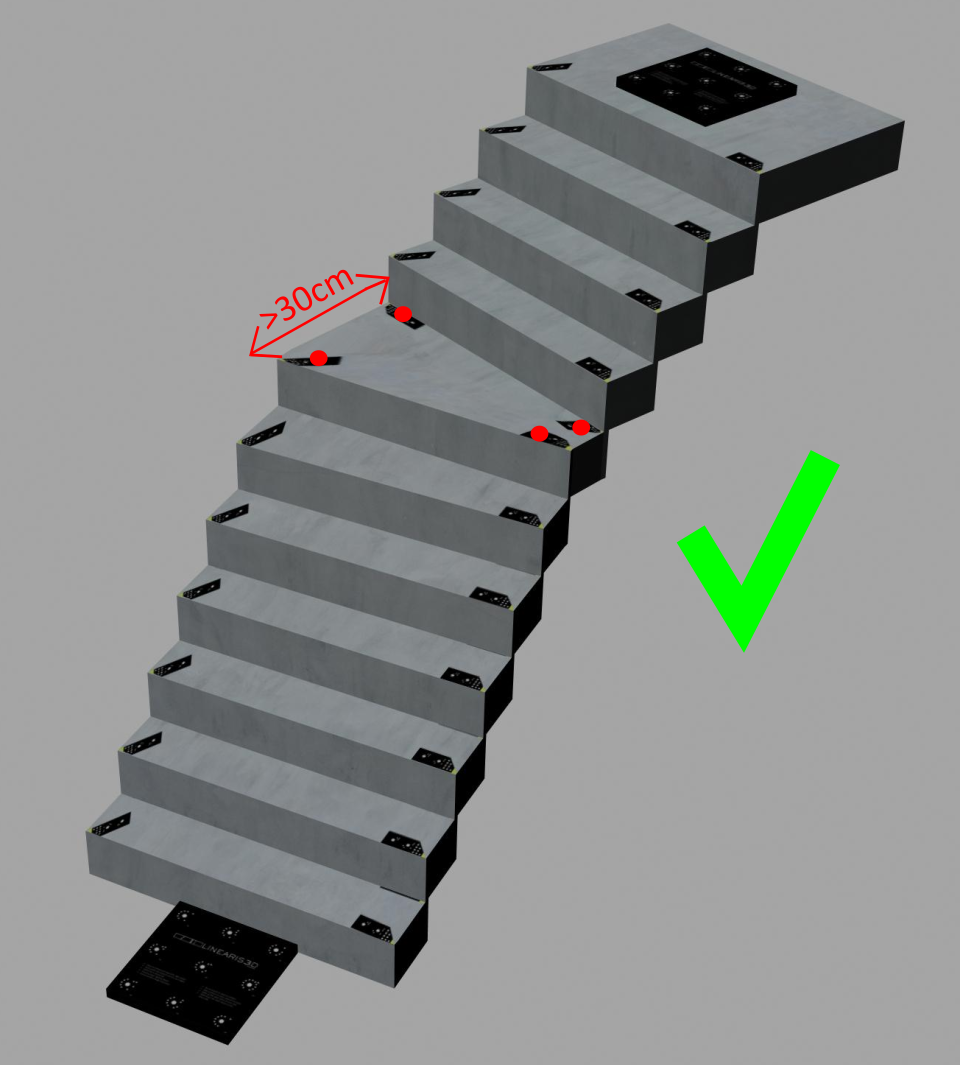
For steps wider than 30cm, 4 markers should be used per step |
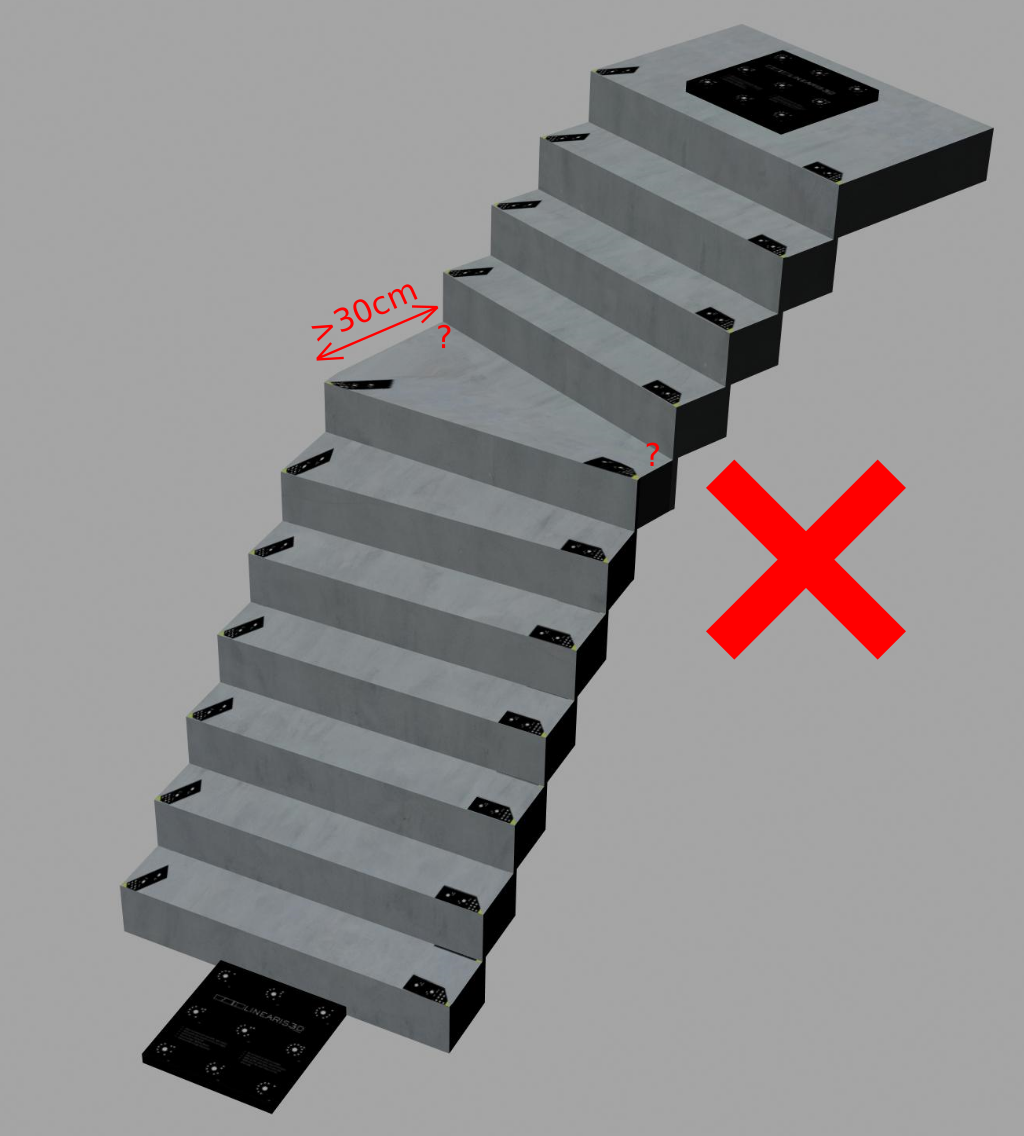
Wrong: Too long distances between the markers |
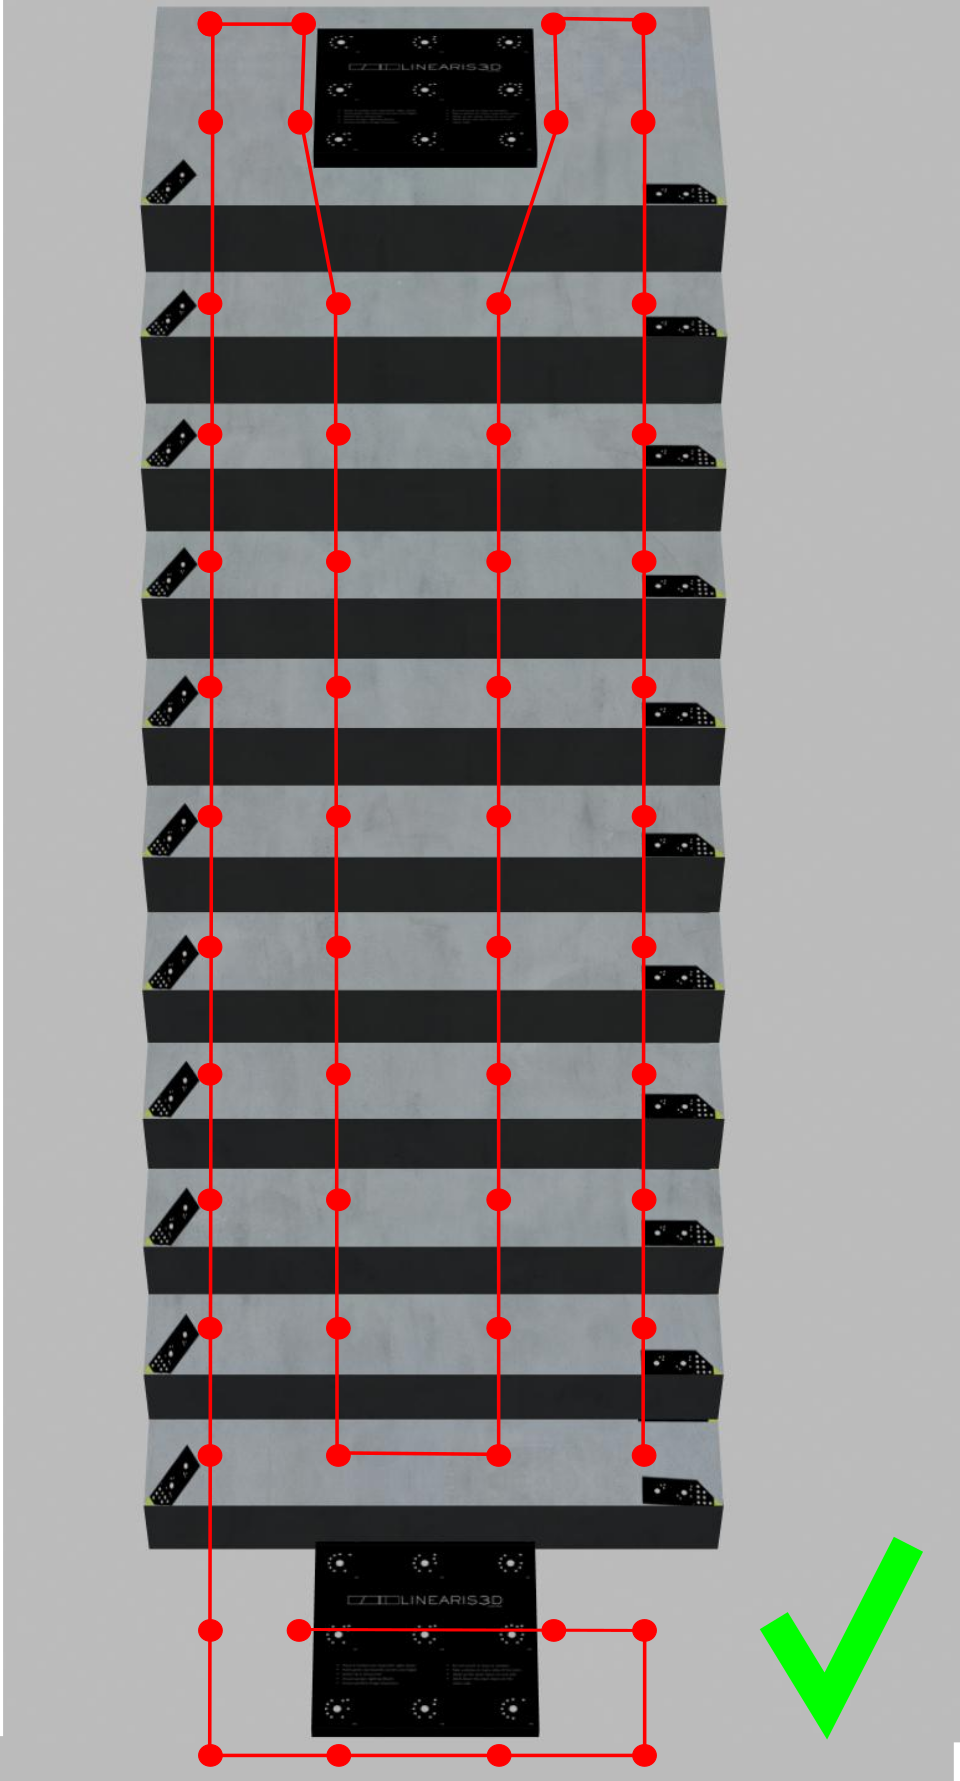
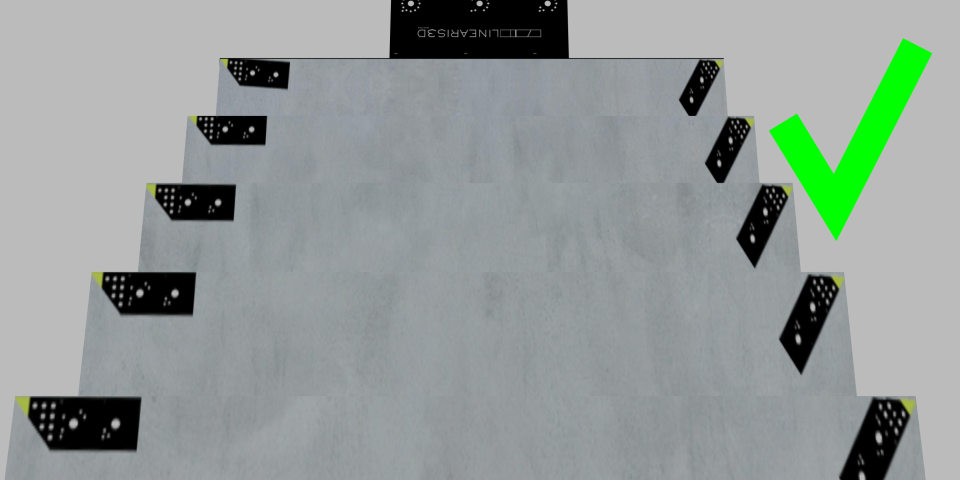
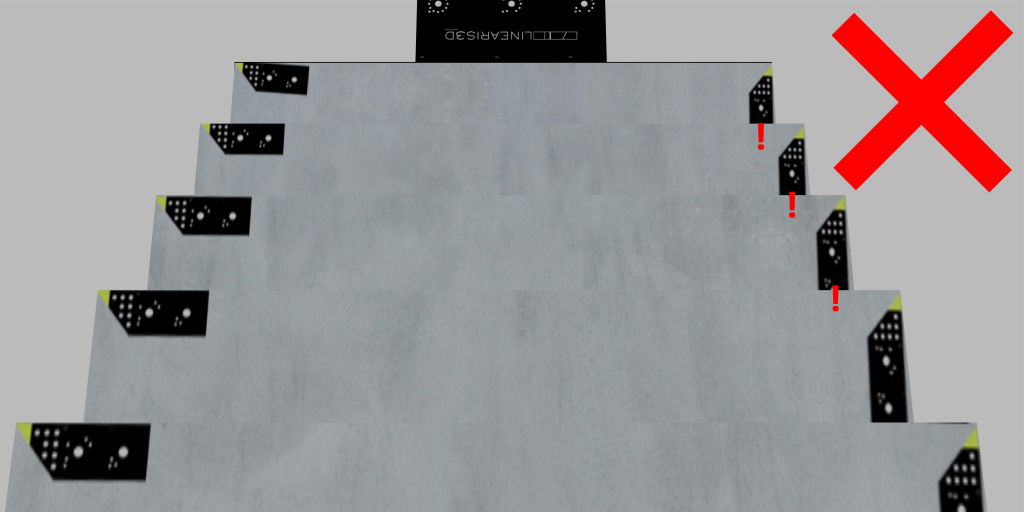
You should go upstairs and downstairs on the very left and the very right side of the stairs. so that pictures are taken from as different angles as possible. A dot means that you should take pictures at this position. |
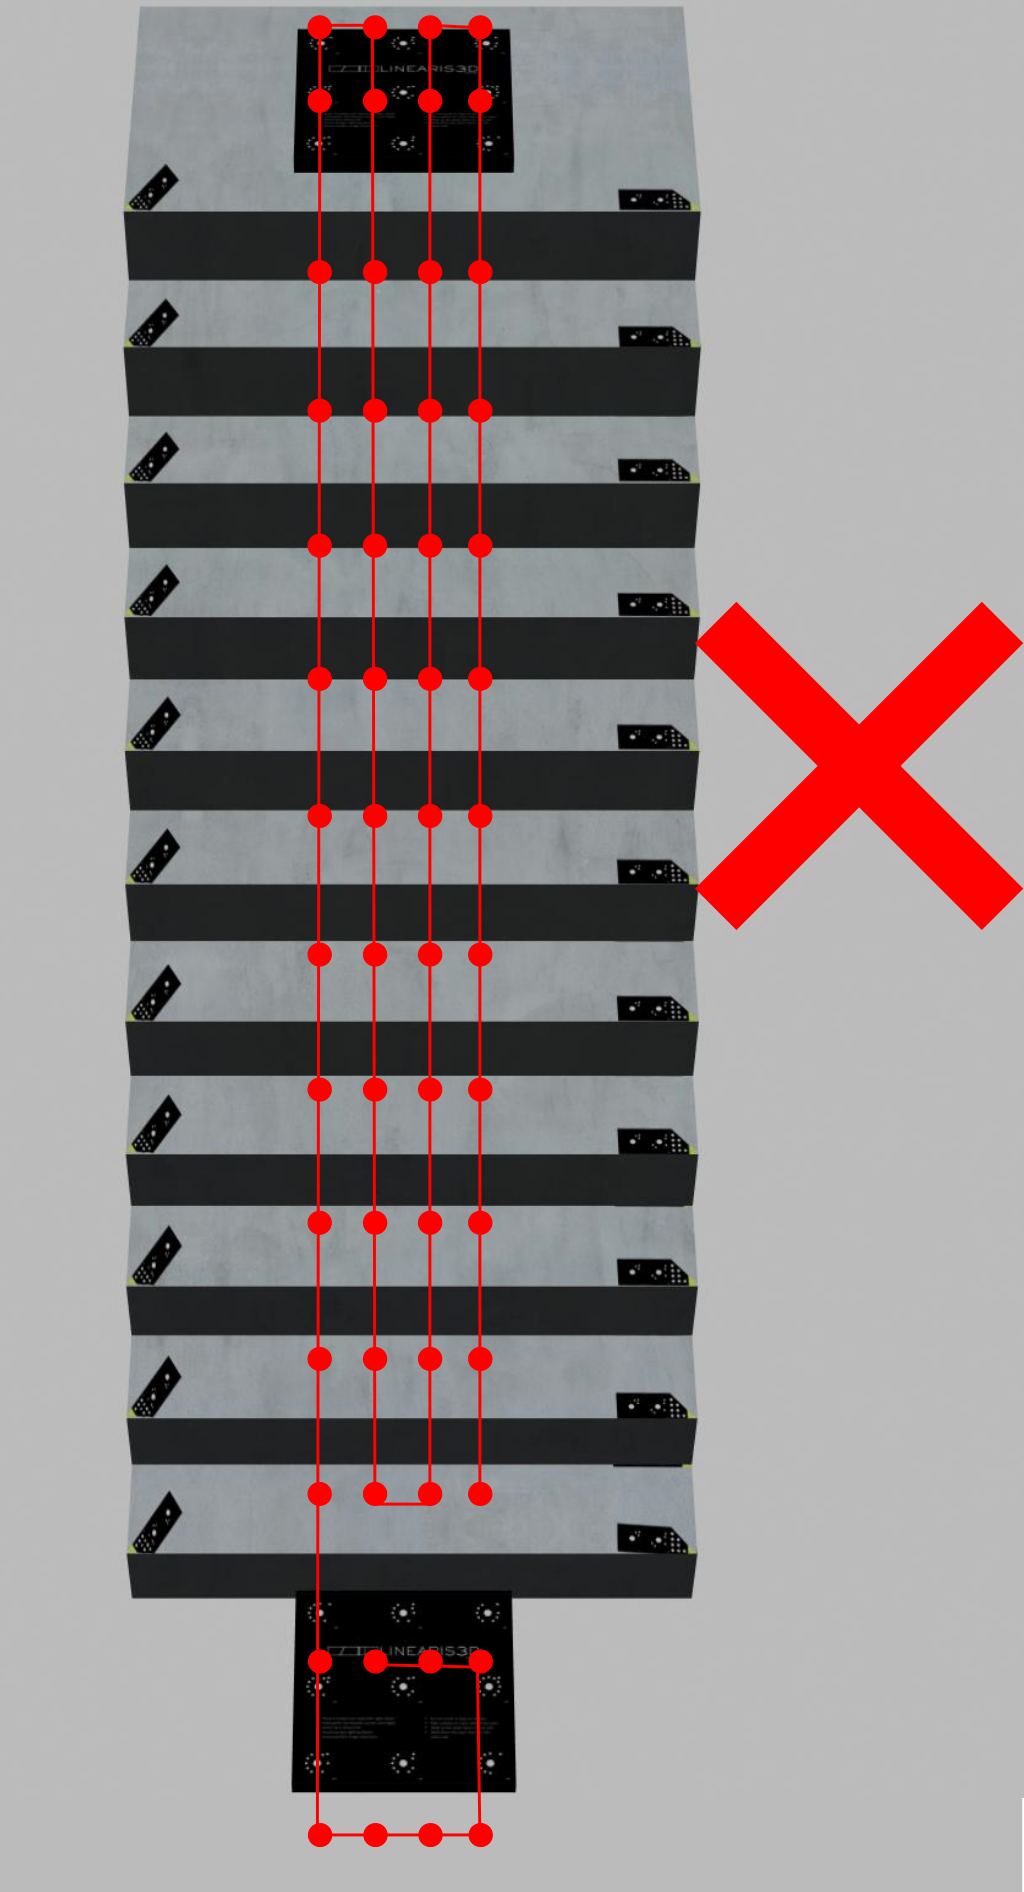
Wrong: Pictures are all taken in the middle of the stairs |