Deutsch Contact
Home› Guides› Quick start: using the iOS app
Guide

Quick start: using the iOS app

From the empty project list to a finished staircase — how the StairsMeasure app for iPhone and iPad works. Unlike Windows, everything stays on the device: you photograph and calculate on the spot, without transferring images.
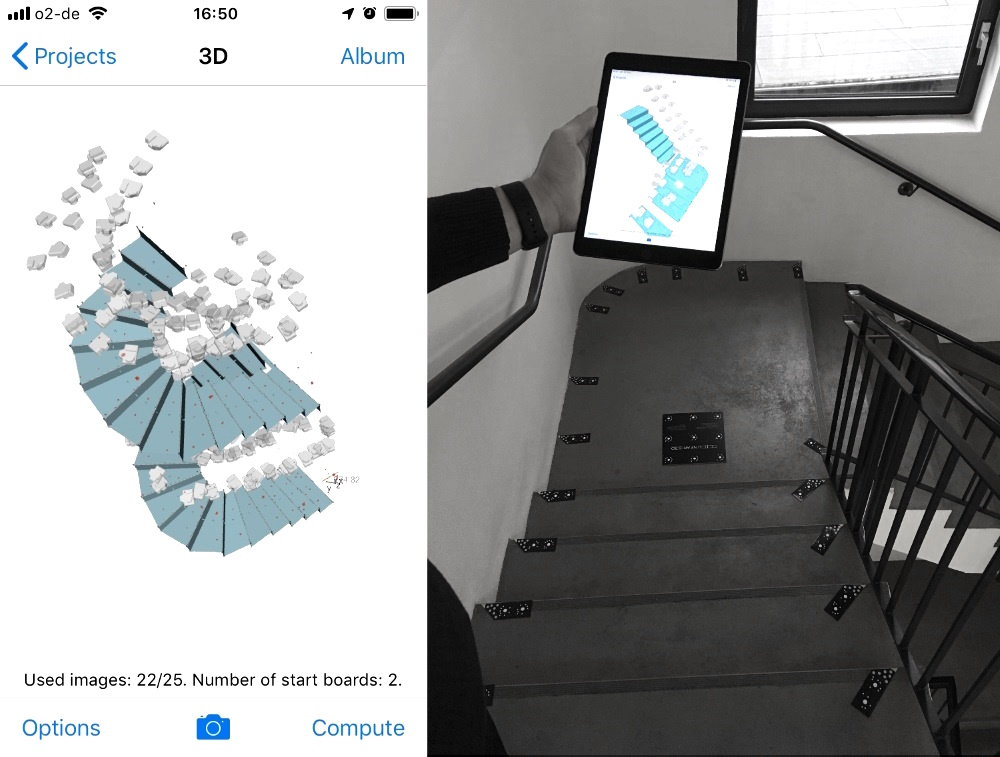
Measuring a staircase with the iPad in the stairwell

Before you start

  • An iPhone 12 or newer, or an iPad Pro. In dark stairwells the flash matters.
  • The StairsMeasure app from the App Store.
  • Targets and two reference boards. You can print both from the app — but then at original size, without scaling, and measure the printout afterwards. Incorrectly scaled targets distort the scale of the whole measurement. If you measure regularly, use the professional marker sets.
  • An internet connection for the calculation. You can photograph without coverage and run the calculation later.

Step by step

  • Lay out the targets. Two targets per step, one reference board at the bottom and one at the top of the flight, each with additional targets around it. The detailed guide shows the positioning in full.
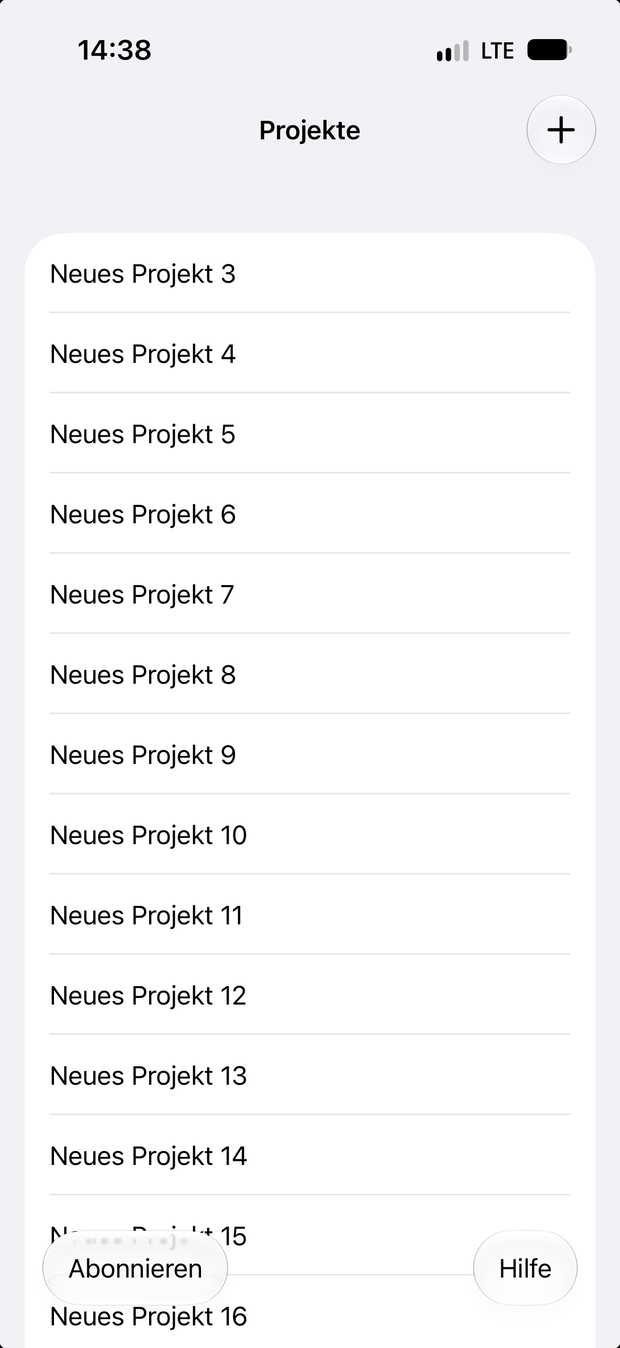
  • Create a project. The app opens with the Projects list. The + at the top right starts a new measurement; the list entry takes you back into the project at any time.
  • Photograph the staircase. The camera symbol in the bottom bar opens capture. Walk around the staircase and photograph it from as many different perspectives as possible, with sufficient overlap. Each target should appear in several images.
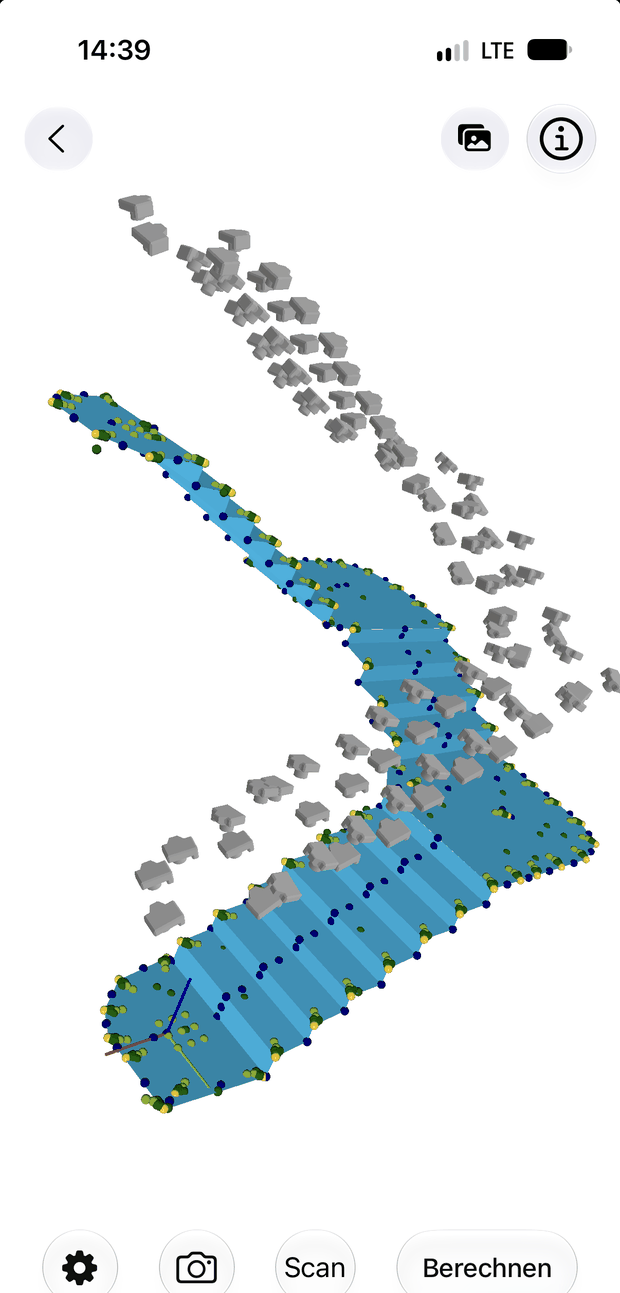
  • Scan the surroundings (optional). Scan uses the built-in LiDAR sensor to capture the surroundings — walls, railings, obstacles. In the result the scan sits in grey next to the steps calculated in blue.
  • Calculate. Compute starts the evaluation. It runs online and the result is ready within a few minutes.

Check the result — while still on site

This is the real advantage over the Windows app: you see immediately whether the measurement is complete, and can take the missing shots before you leave the site.

  • The 3D view shows the calculated steps with their measuring points. If the complete flight can be rotated and inspected, the measurement has gone through.
  • The status line below the view states how many images could be oriented and how many start boards were detected — for example “22 of 25 images, 2 start boards”. If many images stay unoriented, overlap is usually the problem.
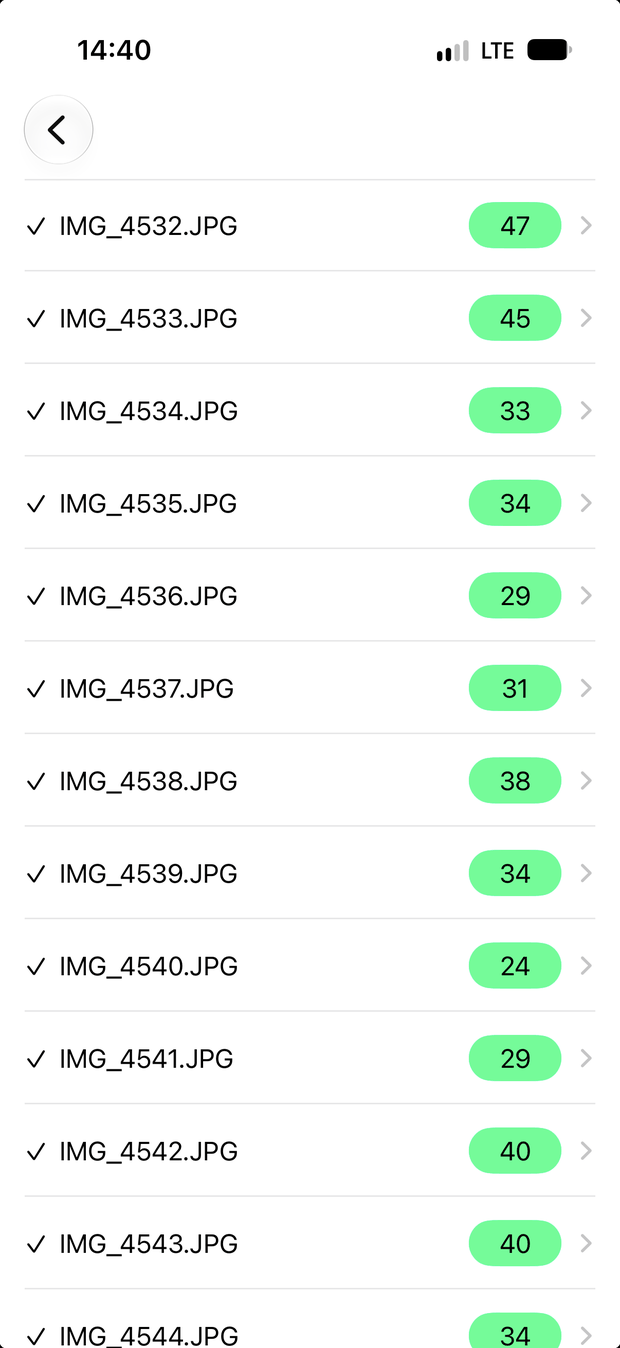
  • The image list behind the album symbol goes one level deeper: for each photograph it states how many targets were detected in it. That shows at a glance which shot contributed little — and where you should photograph again.
  • If a range of steps is missing, add shots of that spot specifically and start the calculation again.

If something is missing

The most common causes of an incomplete measurement are too few images, insufficient overlap, shots of only one side of the stairs, blurred images and duplicate targets. If the app reports “Less than 3 images oriented”, add more photographs of reference board A and calculate again. Further symptoms and their remedies are listed under troubleshooting.

Passing the result on

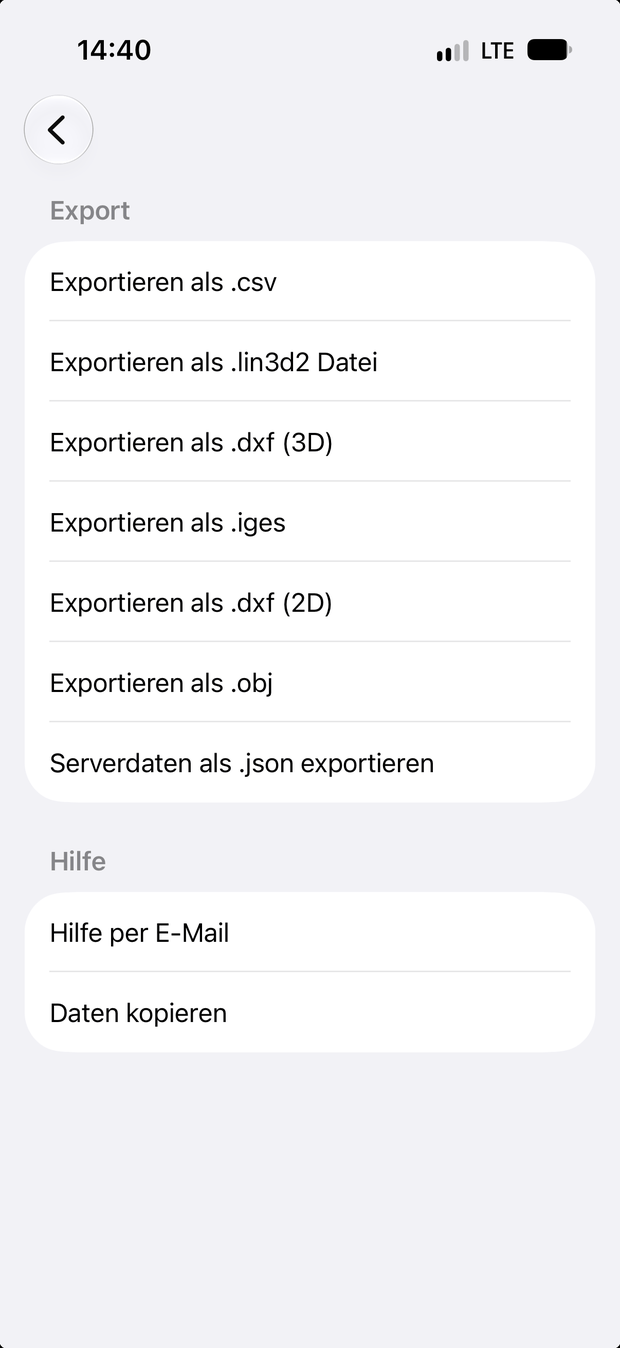
The export list is in the project menu. The app writes the finished measurement in these formats:

  • IGES and DXF (3D) — the usual routes into CAD.
  • DXF (2D) for the drawing plane. Requires the platforms to be parallel to one another.
  • OBJ for passing the result on as a 3D mesh.
  • CSV for the plain point coordinates.
  • lin3d2 — the project format that the free Viewer opens. Use it to pass a measurement to colleagues or clients without them needing a licence.

What the result looks like in CAD is shown by the sample files — you can download them and check them in your own program before measuring yourself.

Prefer to work at the computer?

The Windows app uses the same algorithms and produces the same result, but offers more comprehensive analysis and editing and works without an internet connection. In return the images have to be transferred from the camera to the computer first. Its operation is described in the quick start for Windows, the differences in the comparison on the overview page.
Video

Figures

Try the system on your own staircase

We will advise you on the equipment that suits your projects — and send you a demo kit on request.